A roof is one of the most important structural elements of any building. It protects your home or business from rain, heat, wind, snow, and long-term environmental damage. When a roof reaches the end of its lifespan or suffers severe damage, proper planning and execution become essential. This guide explains everything you need to know about roofing installation, from understanding roof types to following the correct installation steps, choosing materials, and ensuring long-term performance.
Understanding the Meaning of Roofing Installation
Roofing installation means building a brand-new roof or replacing an existing one to provide durable protection against weather elements. It involves several technical stages, including surface preparation, material placement, waterproofing, and finishing. A well-installed roof increases energy efficiency, improves curb appeal, and raises property value.
Moreover, installing a roof correctly reduces the risk of leaks, mold growth, and structural damage. Because the roof works as the first line of defense, every step must follow industry standards and local building codes.
Why Proper Roof Installation Matters
A roof is not just about appearance. Instead, it plays a vital role in maintaining indoor comfort and structural safety. When professionals follow correct methods, the roof lasts longer and performs better in extreme conditions.
Here are some key benefits of correct installation:
-
Protects against water intrusion and moisture damage
-
Improves insulation and energy efficiency
-
Enhances property value and visual appeal
-
Reduces maintenance and repair costs
-
Ensures compliance with safety and building regulations
Because of these reasons, homeowners should always focus on quality rather than shortcuts.
Common Signs You Need a New Roof
Before starting any project, you should know when replacement becomes necessary. Some warning signs appear gradually, while others demand immediate action.
Common indicators include:
-
Curling or missing shingles
-
Water stains on ceilings or walls
-
Sagging roof structure
-
Granules collecting in gutters
-
Frequent leaks after rainstorms
If you notice these issues, timely Roofing installation helps prevent further structural damage and costly repairs.
The Complete Roof Installation Process Explained
Understanding each stage of the installation process helps you make informed decisions and communicate better with contractors. Below is a step-by-step breakdown.
Step 1: Tearing Off the Old Roof
The first step involves removing the existing roofing materials. Contractors strip off old shingles, nails, and underlayment to expose the roof deck. This step allows them to inspect the deck for rot, cracks, or structural weakness.
Skipping this stage often leads to uneven surfaces and reduced roof lifespan. Therefore, complete removal is essential for a durable result.
Step 2: Installing the Drip Edge
Next, roofers install a drip edge along the roof edges. This metal flashing directs water away from the fascia and prevents moisture from seeping under the roofing materials.
Because water damage often starts at the edges, this step plays a critical role in long-term protection.
Step 3: Rolling Out the Underlayment
Underlayment acts as an extra moisture barrier between the roof deck and shingles. Roofers roll it across the surface and secure it firmly.
This layer improves waterproofing and protects the deck if shingles fail due to wind or aging.
Step 4: Waterproofing the Valleys
Roof valleys handle large volumes of water during rainfall. Therefore, installers apply special waterproof membranes in these areas.
This process prevents leaks where roof planes intersect and significantly increases durability.
Step 5: Applying Starter Shingles
Starter shingles create a secure base for the first row of shingles. They improve wind resistance and ensure proper alignment.
Without this step, shingles may lift during storms or high winds.
Step 6: Installing the Shingles
This stage forms the main visual and protective layer. Roofers install shingles from the bottom upward, overlapping each row to channel water downward.
They follow precise patterns to ensure even coverage and consistent appearance. During this stage, skilled workmanship makes a noticeable difference in longevity.
Step 7: Installing Flashing
Flashing protects vulnerable areas like chimneys, skylights, and vents. Installers place metal flashing around these points to prevent leaks.
Because many roof failures occur near penetrations, this step demands accuracy and experience.
Step 8: Capping the Ridge
The final step involves installing ridge caps along the roof peak. These caps seal the top and improve ventilation.
Proper ridge capping completes the system and enhances overall performance.
Types of Roof Styles Explained
Choosing the right roof style depends on climate, budget, and architectural design. Below are the most common roof styles used today.
Gable Roof
A gable roof features two sloping sides that meet at a ridge. It offers excellent ventilation and works well in areas with moderate rainfall.
Hip Roof
Hip roofs slope on all sides, providing better stability in high-wind regions. They also offer good insulation and a balanced appearance.
Flat Roof
Flat roofs are common in commercial buildings and modern homes. They cost less and allow easy access for maintenance or solar panels.
Mansard Roof
This style features four sides with a double slope, creating extra living or storage space in the attic.
Gambrel Roof
Often seen in barns, gambrel roofs provide maximum interior space while maintaining a traditional appearance.
Shed Roof
A shed roof slopes in one direction and suits modern designs. It allows efficient drainage and simple construction.
Butterfly Roof
This inverted design channels water toward the center. It supports rainwater harvesting and modern aesthetics.
Dormer Roof
Dormer roofs add vertical windows and increase usable attic space while enhancing natural light.
M-Shaped Roof
An M-shaped roof resembles two gable roofs joined together. It improves drainage and creates a unique visual appeal.
Dutch Roof
This design combines gable and hip styles, offering better ventilation and aesthetic versatility.
Understanding Roof Material Options
Material selection impacts durability, cost, and appearance. Below are commonly used roofing materials.
Asphalt Shingles
Asphalt shingles are affordable, easy to install, and available in many colors. They suit most residential projects.
Metal Roofing
Metal roofs last longer and reflect heat, improving energy efficiency. They perform well in extreme weather.
Tile Roofing
Tile roofs offer a classic look and excellent durability. They work best in warm climates but require strong structural support.
Wood Shingles
Wood shingles provide a natural appearance. However, they require regular maintenance and fire protection.
Flat Roof Materials
Flat roofs often use built-up roofing (BUR) or modified bitumen. These materials offer fire resistance and energy efficiency.
What Is a Type 3 Roof?
A Type 3 roof refers to shingles that pass the UL 2218 Class 3 impact-resistance test. During testing, a 1.75-inch steel ball drops from a height of 17 feet onto multiple areas of the shingle deck.
These shingles resist moderate hail damage and suit regions with occasional storms. Choosing impact-resistant materials improves roof lifespan and may lower insurance premiums.
Cost Factors in Roof Installation
Several factors influence the overall cost of a roofing project.
Key cost elements include:
-
Roof size and pitch
-
Material type
-
Labor complexity
-
Removal of old roofing
-
Local permit requirements
For example, gable roofs typically cost less due to simple design, while hip roofs cost more because of added materials and labor.
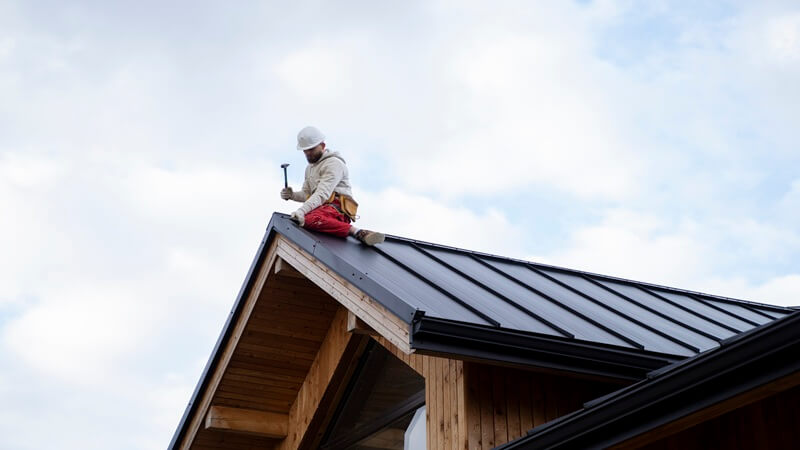
Safety Measures During Installation
Roof installation involves working at heights and handling heavy materials. Therefore, safety remains a top priority.
Professionals use:
-
Safety harnesses
-
Non-slip footwear
-
Secure ladders and scaffolding
-
Protective gear
Homeowners should avoid DIY installation unless they have proper training and equipment.
Maintenance Tips After Installation
Even the best roof requires regular care. Simple maintenance extends lifespan and preserves performance.
Important tips include:
-
Inspect the roof twice a year
-
Clean gutters regularly
-
Remove debris after storms
-
Address minor repairs immediately
With consistent care, Roofing installation delivers decades of reliable protection.
Choosing the Right Roofing Contractor
Selecting a skilled contractor ensures quality results. Always check credentials, reviews, and previous work.
Look for contractors who:
-
Hold valid licenses and insurance
-
Offer written estimates
-
Follow local building codes
-
Provide warranties on labor and materials
Clear communication and transparency help avoid misunderstandings during the project.
Environmental and Energy Efficiency Benefits
Modern roofs contribute to energy savings and sustainability. Reflective materials reduce heat absorption, lowering cooling costs.
Additionally, proper ventilation improves indoor comfort and reduces moisture buildup. As a result, a well-planned Roofing installation supports both environmental responsibility and long-term savings.
Final Thoughts
A roof protects your investment, enhances comfort, and ensures safety. Understanding the installation process, roof styles, materials, and maintenance requirements empowers you to make informed decisions. By following proper steps and working with experienced professionals, you secure a roof that performs efficiently for years to come.
Whether you plan a replacement or a new build, investing in quality materials and skilled workmanship always delivers lasting value.
For more info visit TheSerpentRogue